Configure the Session Expiration Page
About Session Expiration Page
-
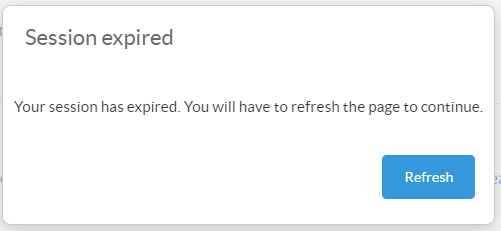
The SmartHub Session Expiration page is used in case the user's browser session expires, and seamless authentication is not possible for various reasons.
-
The AuthDialog module controls the Session Expiration page.

How to Configure the Session Expiration Page
To configure the AuthDialog component, insert the AuthDiag settings code into settings for the HTML page (your custom Results.html page, for example) you wish to use the component.
-
For more information about using Custom Settings, see How to Customize Your SmartHub User Interface.
UI Builder
The easiest and fastest way to change the Session Expiration page is via the SmartHub UI Builder.
For information about how to access the UI Builder as well as who can access it, see How to Use the UI Builder.
Procedure:
-
SmartHub administrators can simply click the UI Editor link from the SmartHub ADMINISTRATION page.
-
Click the Select a page link from the top menu.
-
Select (double-click) the page (Index.html, Results.html, landing.html, etc.) you wish to modify.
-
Below, the Results.html page is shown for sample purposes.
-
BA Insight recommends you create your own custom page and folder to modify. Leave the default files as templates.
-
Example: MyResultsPage.html
-
-
-
Select the Advanced mode from the top right of the page.
-
Select Advanced settings edit.
-
Scroll down to line 239 (this may vary), which contains the text
SH.AuthDialog.CustomSettings
-
Click the link Default Settings at the top right.
-
A new browser tab opens with all available SmartHub module settings.
- Search for the word "AuthDialog" on the page to quickly navigate to the AuthDialog default settings, shown below:
SH.AuthDialog.DefaultSettings =
    {
        TitleLabel: "Session expired",
        MessageLabel: "Your session has expired. You will have to refresh the page to continue.",
        ActionLabel: "Refresh",
        Action: "return window.location.reload()",
        EventName: "sessionExpired",
        TrySilentRedirect: false,
        TemplatePath: SH.RootLevelURL + "/modules/AuthDialog/templates/template.html",
        ParentContainer: "body",
        AutoRunActionFor:
        {
            "key": "dummy_value"
        }
}- Copy the AuthDialog settings section from SH.AuthDialog.DefaultSettings.
- Go back to your Advanced settings edit tab.
- Paste the copied settings inside section SH.AuthDialog.CustomSettings.
Note: The
Enabledvalue is commented out by default.
-
Modify settings as desired. Refer to the "AuthDialog Settings" table below.
-
Click Save changes.
-
Click the link Preview <html> file.html at the top of the code editor.
-
Review your HTML page in the new tab that opens.
-
Make any necessary changes back in the code editor. Repeat steps 13-18 as necessary.
-
Click Save changes.
AuthDialog Settings
| Option | Value | Description |
|---|---|---|
| TitleLabel | Session expired | The title of the pop-up window for session expiration |
| MessageLabel | Your session has expired. You will have to refresh the page to continue. | The message displayed in pop-up window for session expiration |
| ActionLabel | Refresh | The text from action button |
| Action | return window.location.reload() | The page where the redirect is made after the Refresh button is clicked |
| EventName | sessionExpired | The event that triggers the session expired action |
| TrySlientRedirect | false |
|
| TemplatePath | SH.RootLevelURL + "/modules/AuthDialog/templates/template.html" | The path to the html template used for pop-up window. |
| ParentContainer | body | The selector where the Session expired template is injected |
| AutoRunActionFor | "key": "dummy_value" |
|